
Your deck framing is exposed to rain, snow, and standing water every single day — and without protection, even pressure-treated lumber can rot from the inside out. If you're building or replacing a deck this spring, there's one simple step that can add years to your investment: butyl joist tape. In this guide, you'll learn exactly how to apply it, what mistakes to avoid, and why this affordable material is the best insurance policy your deck will ever have.

Why Your Deck Joists Need Protection
Here's something most homeowners don't realize: the fastener holes in your deck joists are one of the biggest entry points for moisture damage. Every screw and nail that goes through a board creates a tiny pathway for water to seep into the wood grain. Over time, that trapped moisture leads to rot, structural weakening, and eventually a costly deck replacement.
According to the North American Deck and Railing Association (NADRA), a well-built deck should last 25 to 30 years with proper maintenance. But decks that skip joist protection often show signs of structural rot in as few as eight to 10 years — cutting the lifespan of your project by more than half.
Butyl joist tape works like a waterproof barrier that wraps over the top of each joist, sealing around screws and nails to prevent water from penetrating the wood. It's the same type of butyl rubber technology used in commercial roofing and automotive sealing — proven, reliable, and built to last in harsh conditions.
What You'll Need Before You Start
Before you head outside, gather everything in one trip so you're not running back and forth to the garage:
Materials:
- XFasten Butyl Joist Tape for Decking (2 inches x 50 feet) — one roll covers approximately 50 linear feet of joist tops
- Clean rags or a stiff brush
- Rubbing alcohol or a mild degreaser (for stubborn dirt)
- Utility knife or sharp scissors
Quick sizing tip: Measure the total linear feet of your joists, rim joists, and any beams you want to protect. Add 10% for overlap at connections. A typical 12-by-16-foot deck uses roughly 150 to 200 linear feet of joist tape, so plan for three to four rolls.
Ideal conditions: Apply joist tape when the temperature is above 50°F (10°C) and the wood is dry. Butyl adhesive bonds best to clean, dry surfaces. If you've had recent rain, give your framing at least 24 to 48 hours to dry before applying.
Step-by-Step: How to Install Butyl Joist Tape
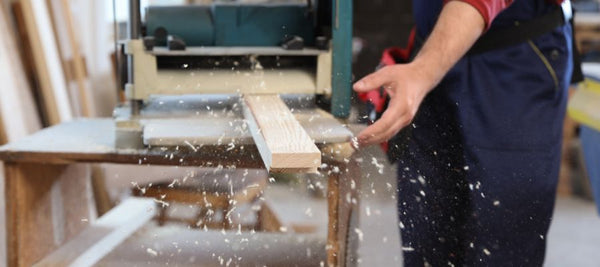
Step 1: Clean the Joist Tops
Use a stiff brush or clean rag to remove any sawdust, dirt, or debris from the top surface of each joist. If the wood is especially dirty or has been sitting exposed for a while, wipe it down with rubbing alcohol and let it dry completely.
This step matters more than most people think. Butyl adhesive forms a strong, self-sealing bond, but it needs a clean surface to grip properly. Skipping this step is the number one reason tape fails to adhere long-term.
Step 2: Start at One End of the Joist
Peel back about 12 inches of the release liner from the roll of XFasten Butyl Joist Tape. Align the tape so it's centered on the top of the joist — you want equal overhang on both sides. For a standard 2-inch-wide joist top, 2-inch tape provides full coverage with a slight wrap on each edge.
Press the first 12 inches firmly into place with your hand. This anchors the starting point so the rest of the application goes smoothly.
Step 3: Roll Out Along the Full Length
Working in manageable sections of two to three feet at a time, peel the liner and press the tape down firmly along the joist. Keep the tape centered and apply steady, even pressure with your palm or a J-roller if you have one available.
Pro tip: Don't stretch the tape as you apply it. Butyl tape is designed to conform to the wood surface naturally. Stretching it can thin out the adhesive layer and reduce its self-sealing ability around fasteners.
Step 4: Seal the Overlap at Connections
Where joists meet the rim joist or ledger board, overlap the tape by at least two inches. Press firmly at the overlap to ensure a watertight seal. Butyl tape sticks to itself exceptionally well, so overlaps create a continuous waterproof barrier.
For corner connections and ledger boards, cut a separate piece and press it over the junction. Think of it like flashing on a roof — you want water to always flow over the tape, never under it.
Step 5: Press Around Any Pre-Drilled Holes
If your joists have pre-drilled holes or existing fastener penetrations, press the tape firmly around these areas. One of butyl tape's best qualities is its ability to self-seal around screws and nails. When you drive a fastener through the tape later, the butyl rubber compresses and wraps tightly around the shaft, creating a waterproof gasket right at the penetration point.
Step 6: Trim and Finish
Use a utility knife or sharp scissors to cut the tape flush at the end of each joist. Run your hand along the entire length one more time, pressing down firmly to make sure there are no bubbles or lifted edges.
That's it. Once the tape is down, you can install your decking immediately — no curing time or drying period needed.
Common Mistakes to Avoid
Even though the installation is simple, a few missteps can undermine your results:
Applying to wet or dirty wood. Moisture and debris prevent the adhesive from forming a full bond. If you're eager to get started after rain, use a leaf blower to speed up drying, and wipe the joist tops with a clean rag before applying.
Skipping the rim joist and ledger board. These are actually the most vulnerable areas of your deck frame because they collect the most water runoff. Protect them the same way you protect your field joists.
Using generic duct tape or contractor tape instead. Standard tapes don't have the self-sealing butyl adhesive that closes around fastener penetrations. They may seem waterproof at first, but they crack and degrade under UV exposure and temperature cycling within one to two seasons.
Not overlapping at connections. Gaps between tape pieces are gaps where water gets in. Always overlap by at least two inches at every junction.
How Butyl Joist Tape Compares to Other Protection Methods
You might be wondering how joist tape stacks up against other approaches. Here's a quick comparison:
Liquid joist sealants require brush-on or roll-on application, take hours to cure, and can be messy. They work, but they add significant time to your build and don't self-seal around fasteners the way butyl tape does.
Peel-and-stick flashing membranes are common in commercial construction. They work well, but they're often more expensive per linear foot and can be trickier to handle on narrow joist tops.
Butyl joist tape offers the easiest application, self-seals around screws and nails, requires zero cure time, and costs a fraction of what you'd spend on liquid sealants for the same coverage. For most DIY deck builders, it's the sweet spot of performance, ease, and value.
Pro Tips for the Best Results
Wrap your beams, too. If your deck has structural beams supporting the joists, tape the tops of those as well. Water pools on any horizontal wood surface, and beams are no exception.
Consider taping the ledger board flashing overlap. Even if you have metal flashing on your ledger board (as building codes typically require), adding butyl tape over the top edge where the flashing meets the house creates a secondary moisture barrier. Belt and suspenders.
Store your tape properly. Keep unused rolls in a cool, dry place out of direct sunlight. Butyl tape has an excellent shelf life, but extreme heat can make it overly soft and harder to handle during application.
Don't forget blocking. If your deck framing includes solid blocking between joists for added rigidity, tape the tops of those pieces as well. Any exposed horizontal wood surface is a candidate for protection.
Build Your Deck to Last
A roll of butyl joist tape costs a few dollars. Replacing a rotted deck costs thousands. When you look at it that way, the math is hard to argue with.
By taking 30 minutes to tape your joists before you install the decking, you're giving your entire deck structure a waterproof shield that self-seals around every screw and nail — the exact points where moisture damage starts. It's one of the easiest, most effective steps you can take to protect your investment.
Ready to get started? XFasten Butyl Joist Tape for Decking (2" x 50ft) is available on Amazon and xfasten.com. Grab enough rolls for your project, and you'll be building on a protected frame by this weekend.
Planning a full deck build this spring? Check out our upcoming guide, "5 Spring Deck Projects That Will Transform Your Outdoor Space," for more inspiration — and sign up for the XFasten newsletter so you never miss a new project guide.

Comments
No comments yet. Be the first!